By now, you may have heard about Google Analytics 4 or GA4. So, why switch to GA4?
One good reason is that Google Analytics 4 is the next generation of the highly successful
Google Analytics (or Universal Analytics – UA) which began a staged sunsetting process
initiated on July 1, 2023.
While implementation dates have been fluid, according to Google, UA properties (including 360
– the paid enterprise version of UA) will stop processing hits on July 1, 2023, although some
properties will continue for a short period as the conversion unfolds. As of now, you will
continue to have access to your processed data until July 1, 2024, a date extended beyond the
initial period first announced.
Bottom line — waiting to convert to Google Analytics 4 could mean the loss of valuable
marketing analytics data, so time is of the essence.
Advancing Analytics for the Future
Using Google’s cutting-edge machine-learning models, GA4 tracks recent market trends and
consumer behaviors across devices and platforms. A superior ROI is all but guaranteed,
especially for your long-term marketing strategies, and the privacy-centric design allows GA4 to adapt to yet-unknown regulations and guidelines that are sure to expand into the future.
GA 4 will be the tech industry leader in advanced analytics for websites and apps. Now, GA4
builds results around users and events rather than sessions (as in the past). Every user
interaction is treated as a separate event using data collection logic and structure to create
valuable and actionable insights.
Why Change Google Analytics 4 from Universal Analytics?
The new version, Google Analytics 4 properties, has some significant differences compared to
the sunsetting UA Model. The most crucial aspect is the application of machine learning to help
reveal insights from the gathered data.
This shift is crucial since, in the past, we relied on a session-based model that categorized user
activities over a specific period. Shifting the focus from overall site analytics and sessions to
events improves pathing analysis capabilities and cross-platform comparisons. By switching to
an event-based model, this update to Google Analytics 4, or GA4, becomes more adaptable
and has improved user behavior prediction.
Regarding the growing call for increased privacy protections, Google asserts that the program’s new iteration is “privacy-centric by design.” That is, Google Analytics will be able to fill in the information gaps when the gathering and sharing of people’s data are more strictly regulated.
Moving from universal analytics to GA4 will strengthen your future analysis and aided by machine learning, lead to better-informed strategies for marketing.
How to Set Up Google Analytics 4
When setting up Google Analytics 4, you must start with Universal Google Analytics (UA). If you
don’t have a UA account, you will want to create one to get started. Don’t worry — Google
allows you to set both up simultaneously if necessary. We’ll walk you through step-by-step how
to create your account.
For New Websites — How to Install Google Analytics 4 and Universal Analytics
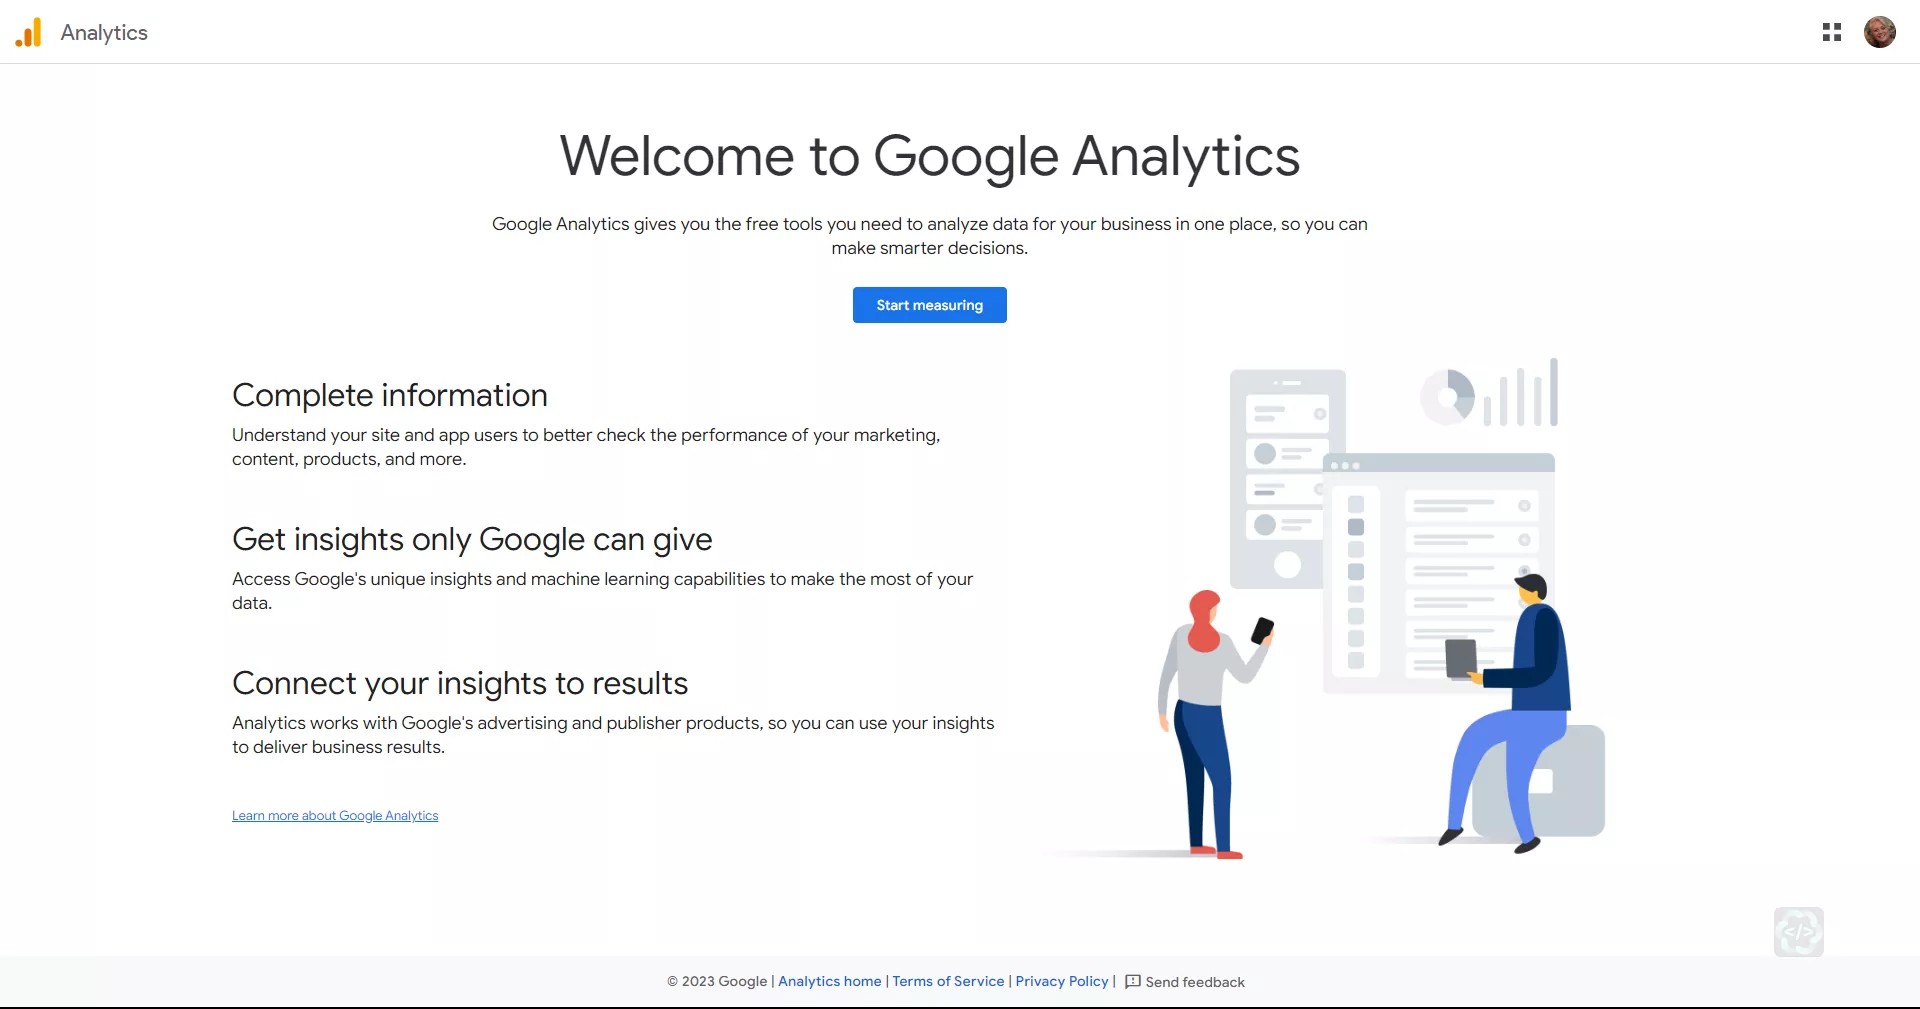
Step 1
- Go to https://analytics.google.com/analytics/
- Click on the “Start Measuring” button.
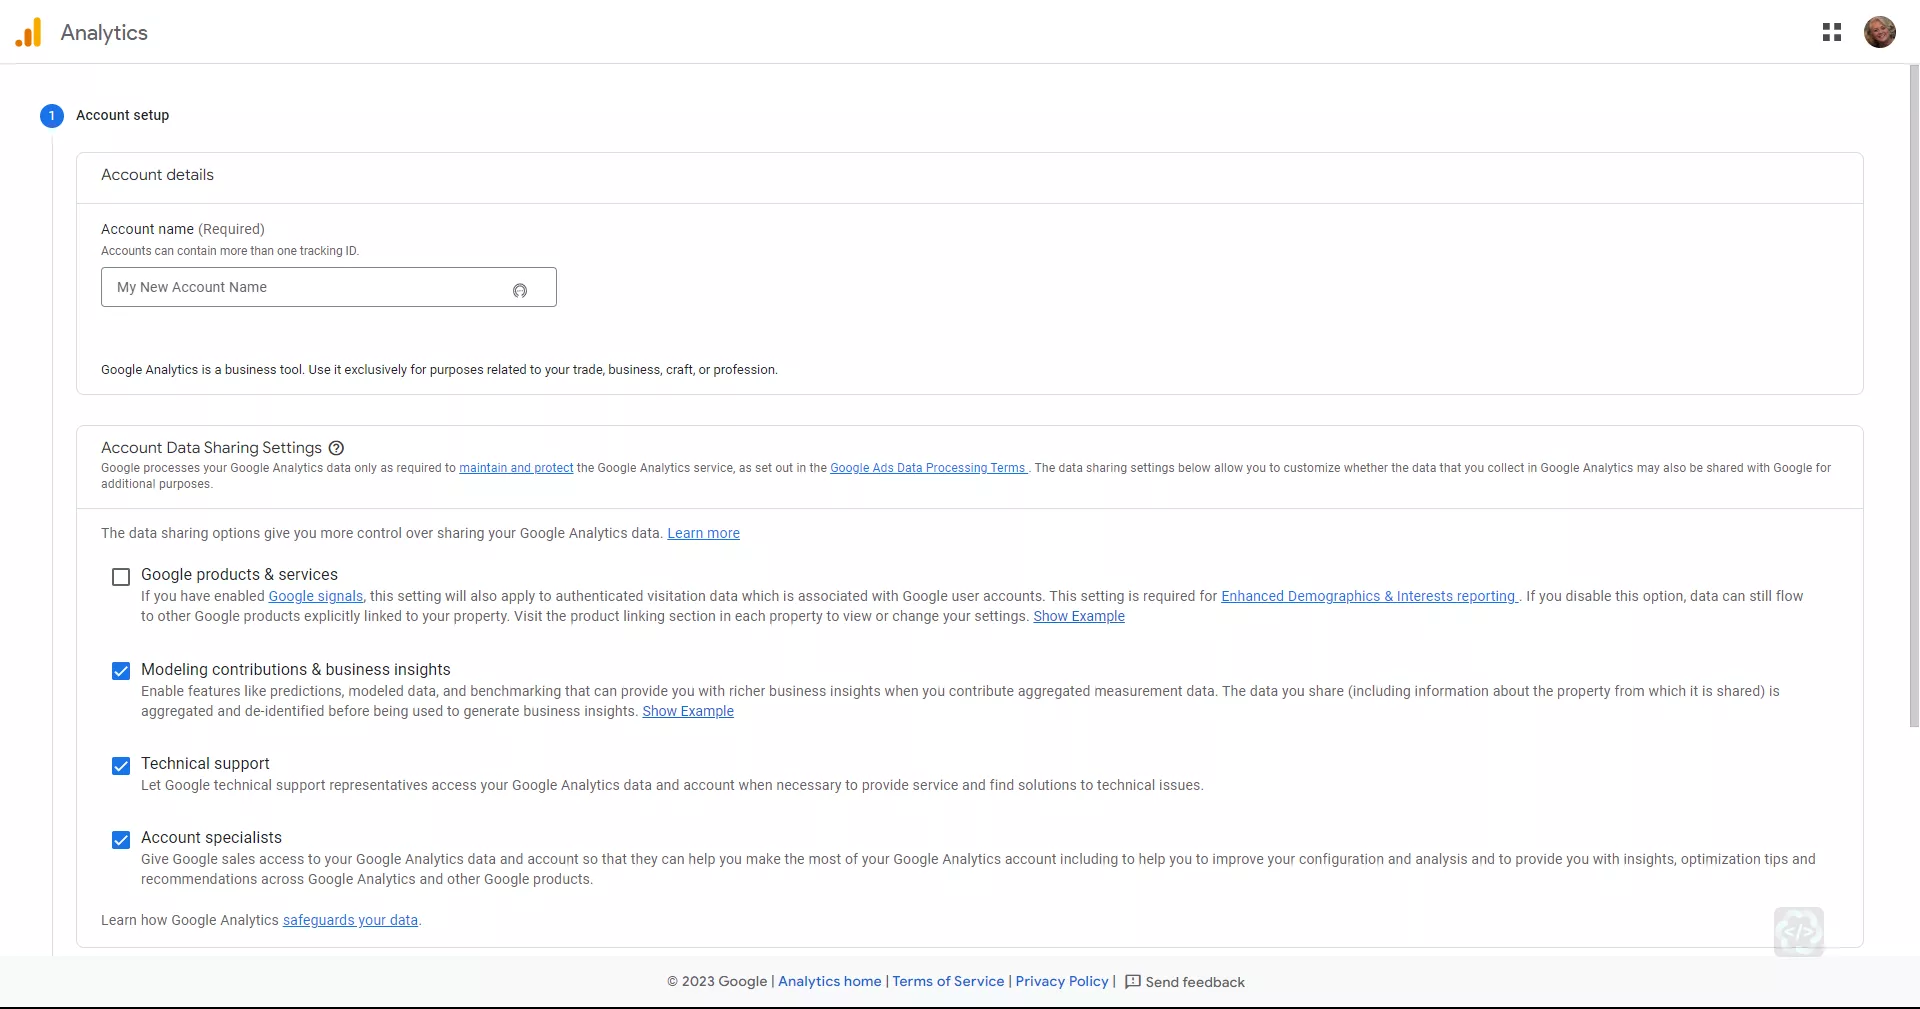
Step 2
- Enter your business name and click “Next.”
Step 3
- Add a “Property Name” and select your “Reporting Time Zone” and the “Currency” that
your site will use.
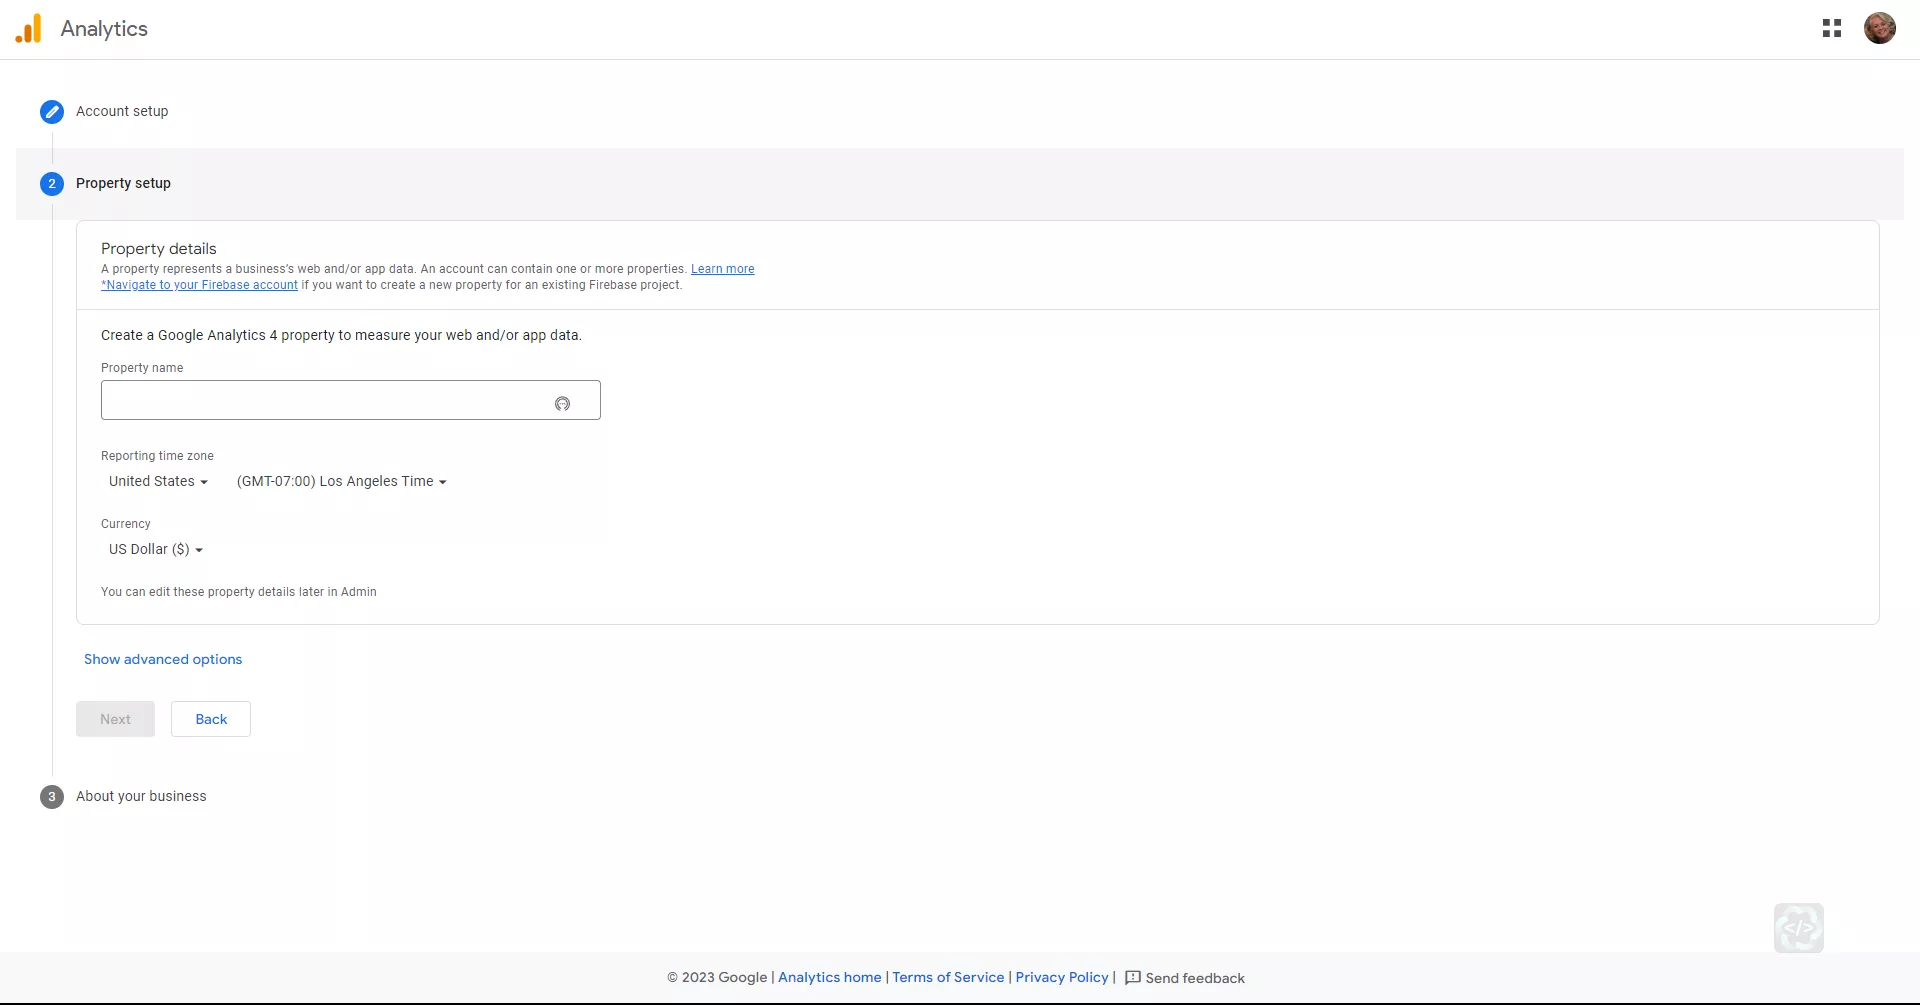
- To make your account a dual GA4 and Universal Account, click “Show Advanced
Options.” You will select the dialog button for “Create both a Google Analytics 4 and a
Universal Analytics property”. - Provide your URL and click “Next.”
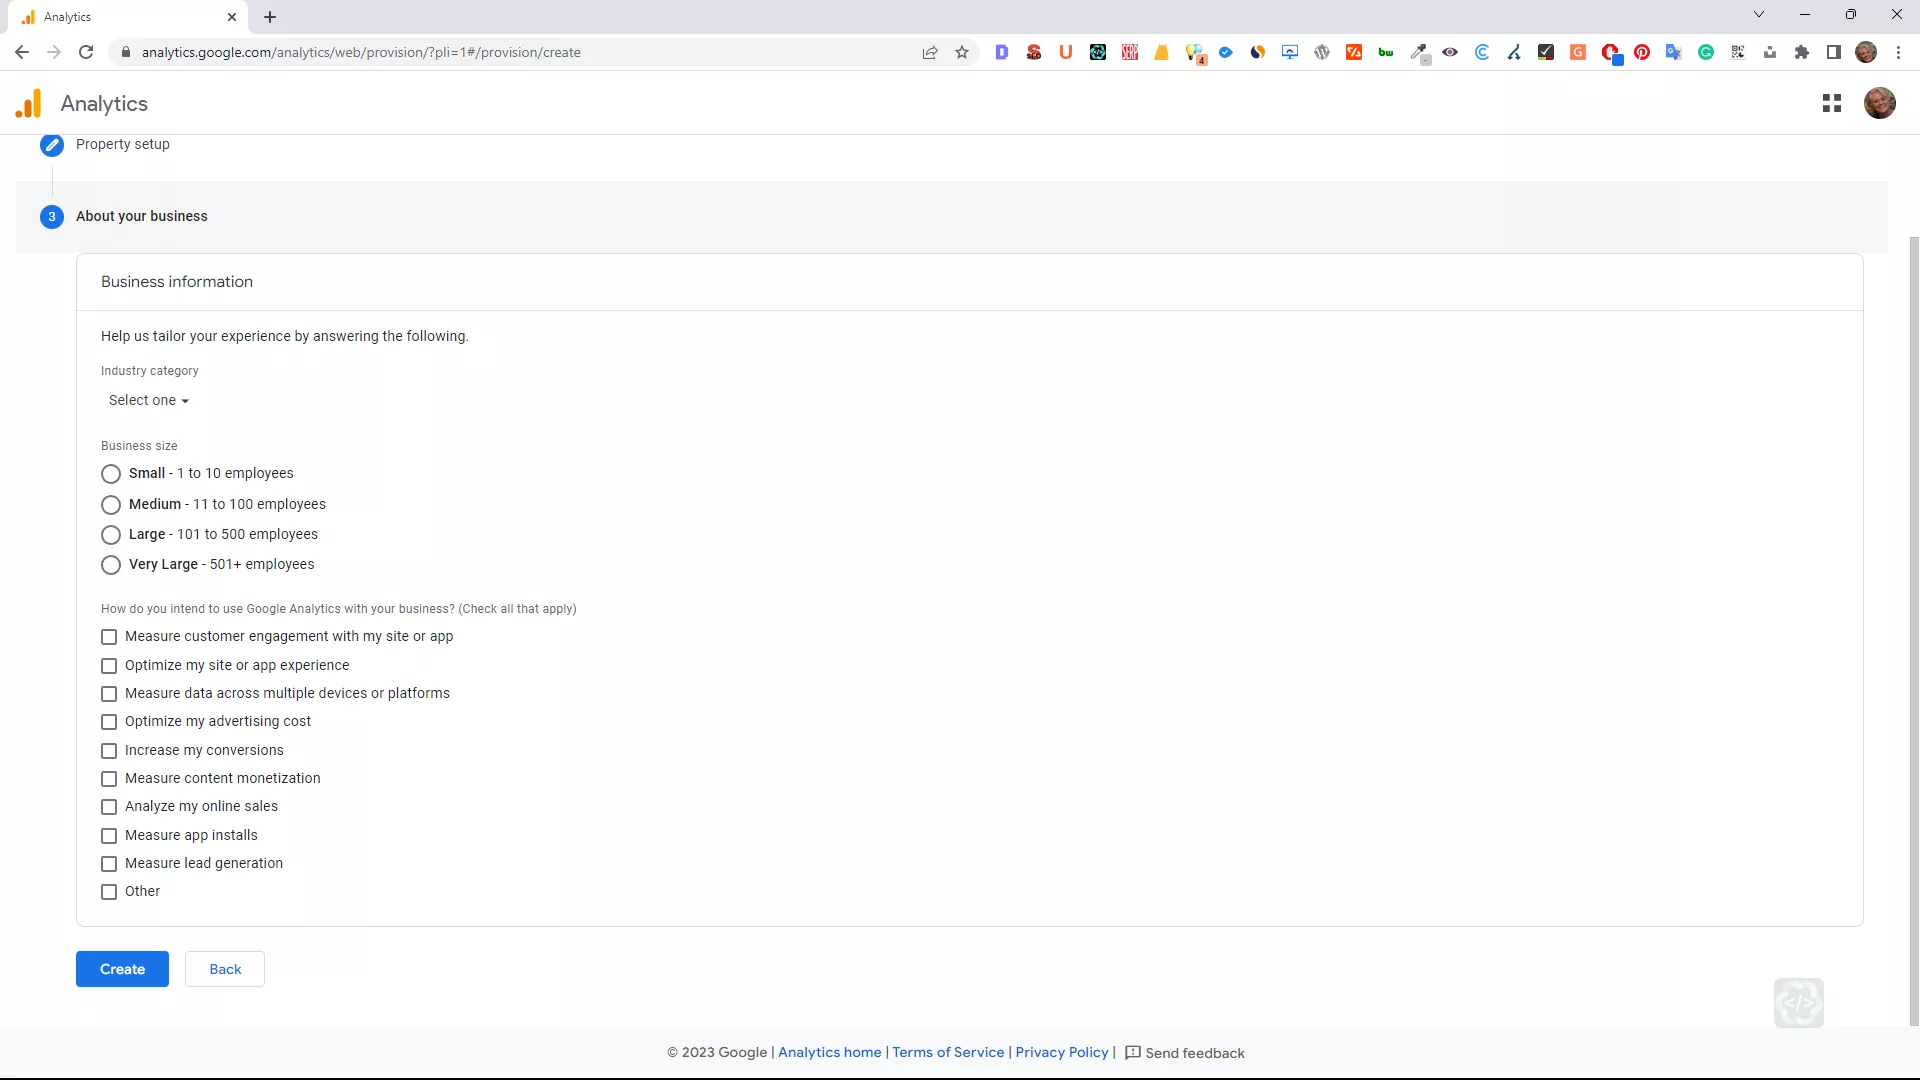
Step 4
- Now you are ready to provide details about your business. Select your industry category, business size, and all the uses you intend for your GA4 account.
- Click the “Create” Button
Step 5
- Read and authorize the Google Analytics Terms of Service, which will take you to your
GA4 Dashboard. Congratulations — you have successfully installed your new Google
Analytics 4!
For Existing Websites — How to Add Google Analytics 4 to an Existing Universal Analytics Account
Step 1
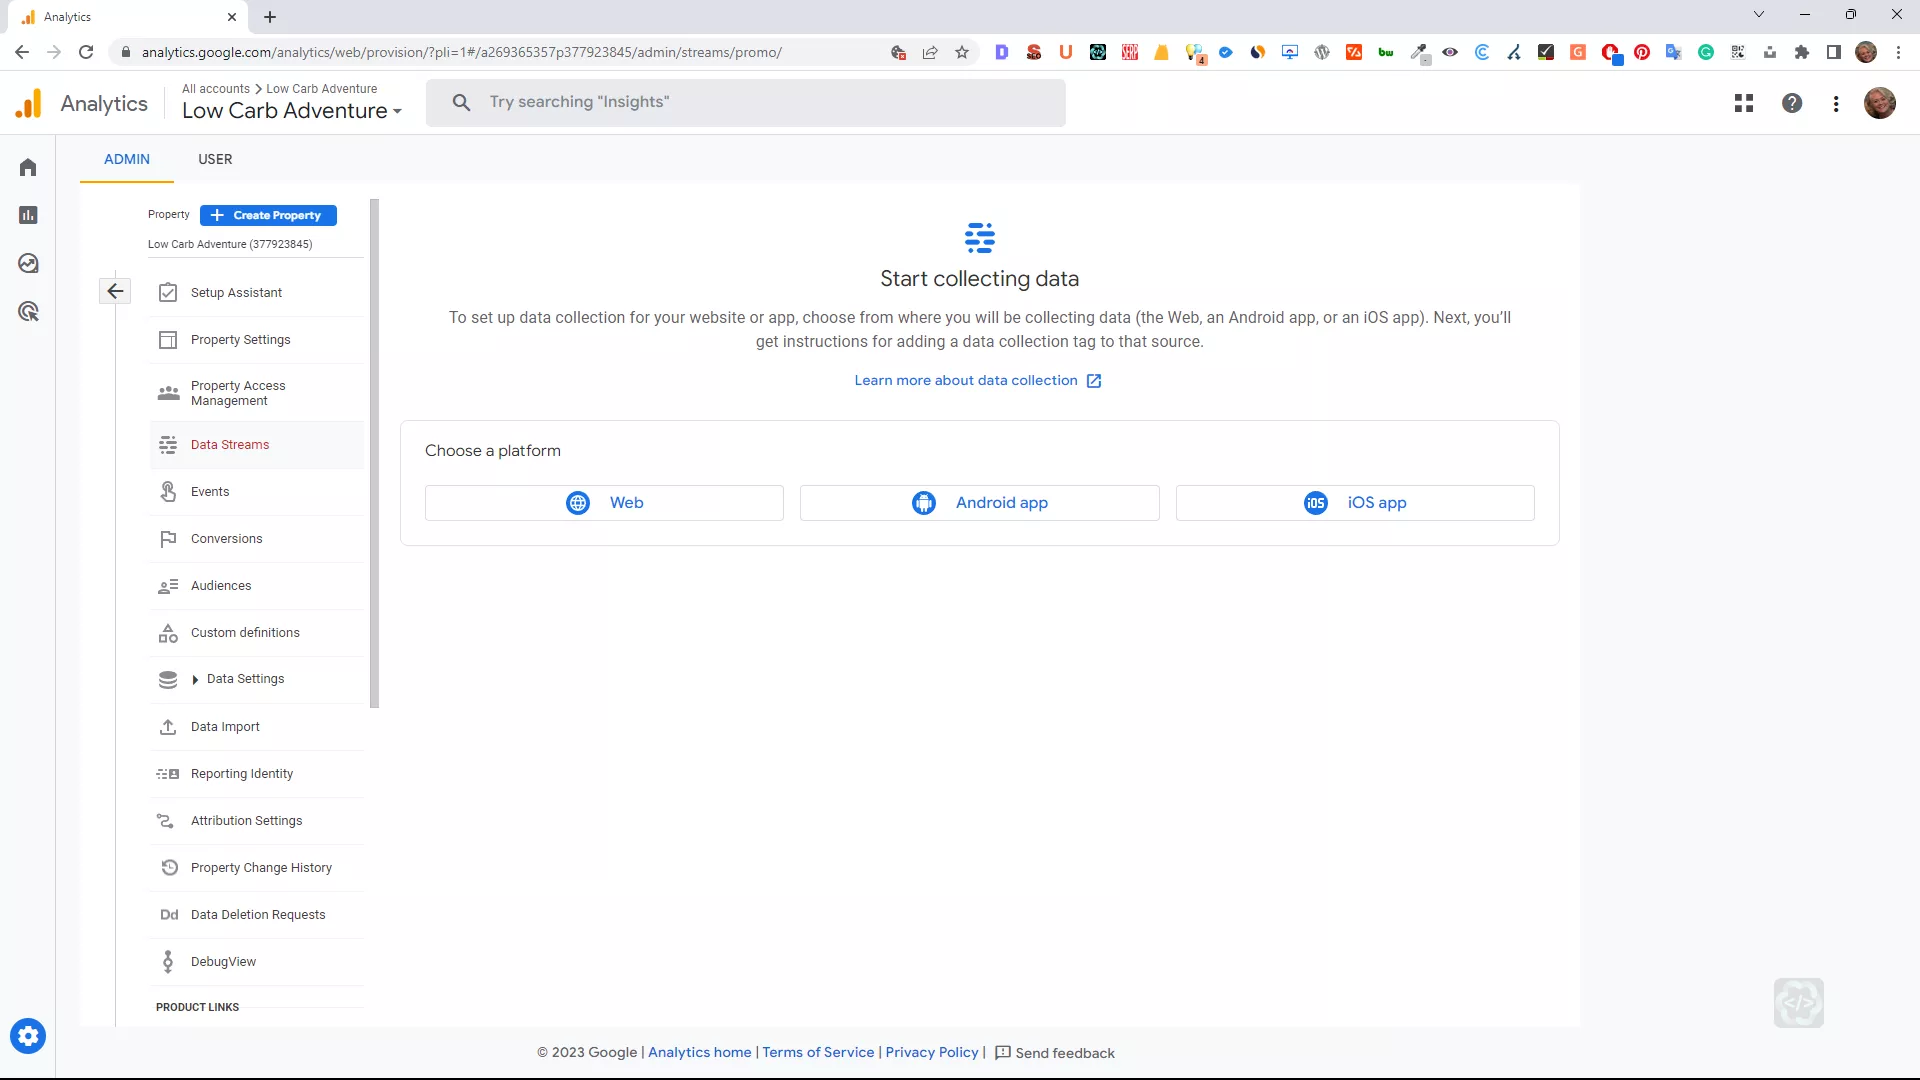
- Log in to your Google Analytics account and click the Admin or Gear icon at the bottom
left. - Be sure you have the correct account selected.
- Click on GA4 Setup Assistant in the Property column.
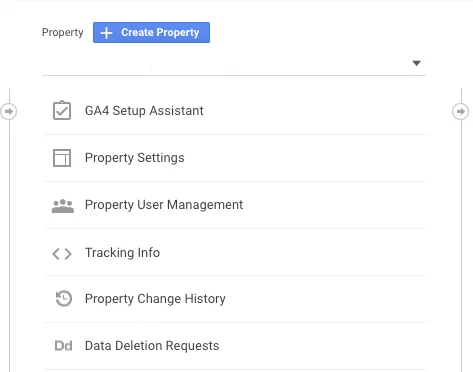
4. Click on the “Get Started” button, which activates a GA4 setup wizard (below).
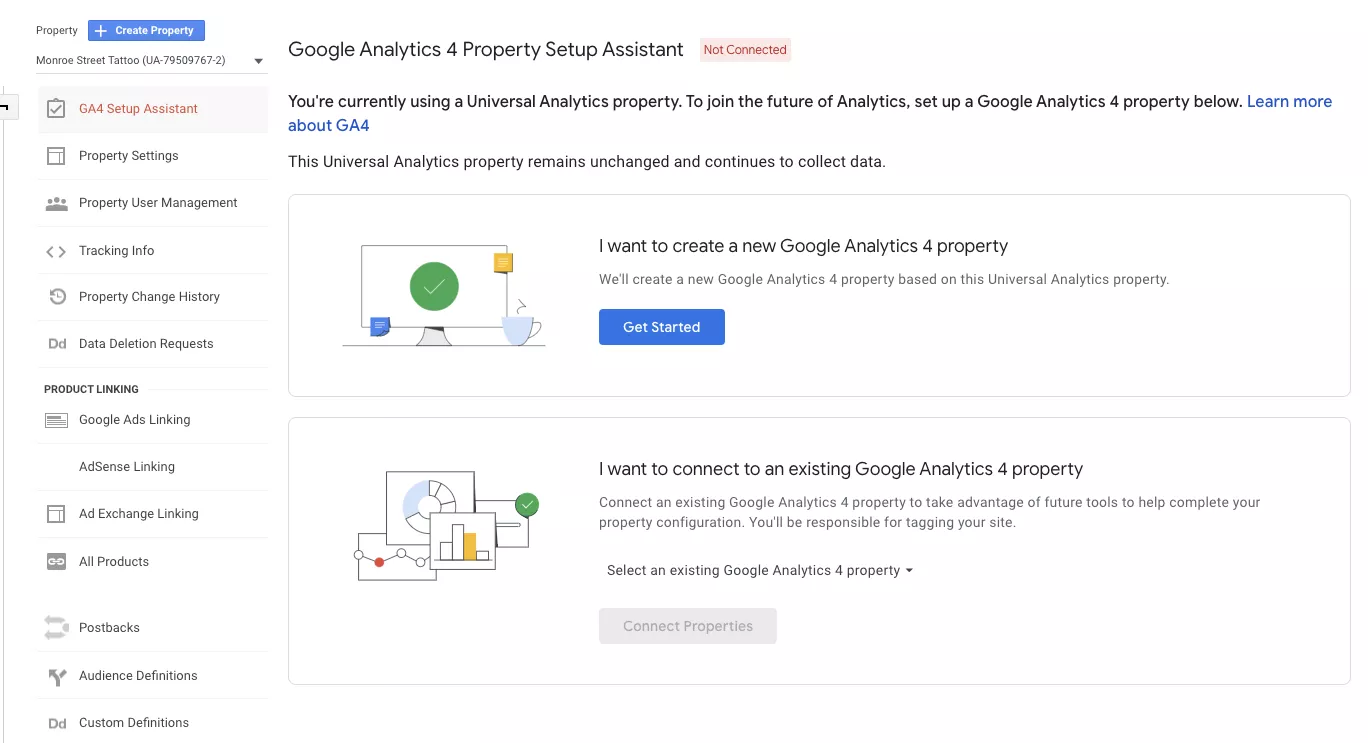
5. Once the wizard is complete, you receive a message that indicates that you have
successfully connected your properties.
Adding Your GA4 Tracking Code or Measurement ID to Your Website
Now you need to add your GA4 tracking code or Measurement ID to your website, which you
can do through several avenues.
First, you can add your GA4 Measurement ID through your WordPress CMS using the Google
Site Kit plugin that uses a wizard and installs your Measurement ID on your site linked to your
GA4 account.
You can also use Google Tag Manager by clicking “Tag Configuration” and entering your
Measurement ID. Next below, choose “All Pages” under the “Triggering” section and click the
“Save” Button.
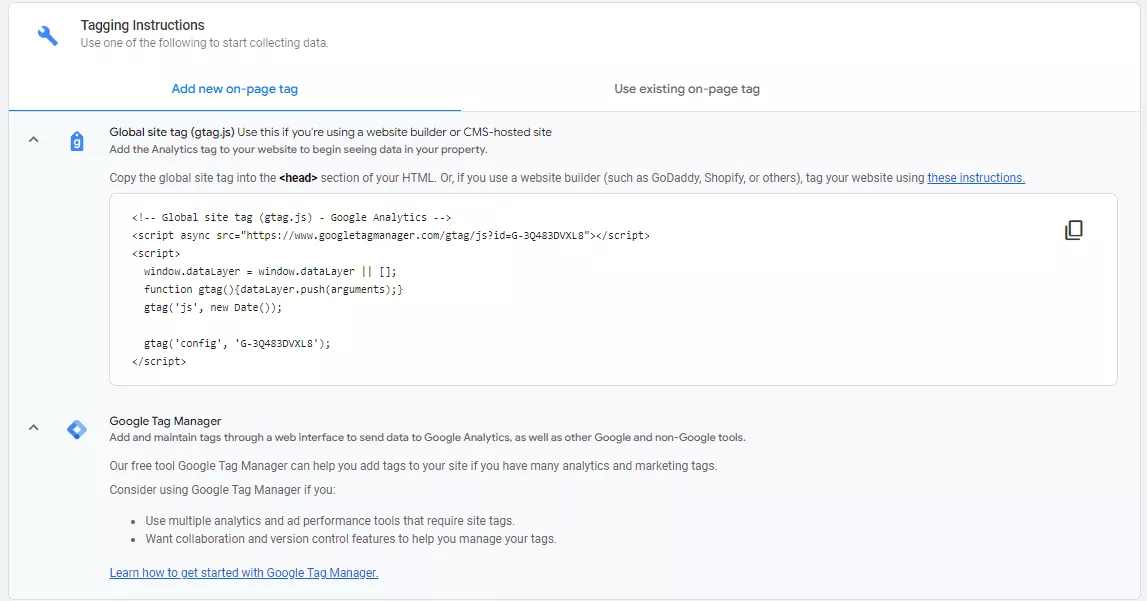
Or finally, you can add code directly to your website’s HTML section; see below. Note the last line in the global site tag sequence has the number: ‘G-3Q48….” – replace that with your measurement ID found on your GA4 dashboard.
A Word About GA4 Events
While UA provides a good selection of on-site behaviors to track, GA4 provides additional
preconfigured and custom events that you design and control. Now measuring a specific
interaction or occurrence on your site is done through Google Analytics 4 event tracking. An
event will be categorized as one of four types of events, web, app, app+web, and android
events.
Events are a fantastic way to monitor important website activity. They can aid in your
understanding of the actions occurring on your website and how they contribute to producing
valuable results. We share valuable insights in an upcoming blog.


